Tuesday 27 May 2014

BACK TO THE BONE

The first step was to strip the model right back to its original core components, and remove all of the now tacky silver paint. Simple White Spirits did the job of getting rid of the spray paint, which allowed me to handle the vinyl model more easily and then disassemble it. The below images are what I have now ended up with (mouth piston and small eye components not shown):


Monday 26 May 2014

RESEARCH - NECK PISTONS & HOSES

Unlike my original build, I decided that I'd try and add some finessing to my re-attempt at getting the Endo Skull right, and plan on adding the neck pistons and braided hoses. I've been searching around for the perfect items to use for these parts, and am still a bit perplexed at what the final pieces should look like. I'll hopefully go into further detail about what I end up using in a later post.

Braided Neck Hose

There are quite a variety of representations of the neck hose out there - most seem to revolve around a braided steel hose capped with a curved elbow joint at the top, disappearing into the skull at a right-angle. Here are a few examples:


All of the above versions feature a braided steel hose with an angled elbow at the top terminating (!!) either into the side of the skull, or forward-facing into the curved crevice where the ear should be.

After making some screen caps from the Blu Ray of The Terminator, it appears that the original neck hose didn't have a curved end; instead it seems to connect with the underside of the T800's skull. This is unlike any of the reproductions shown above. Close inspection of the below HD images seem to confirm this.

For me this is good news - it means that obtaining a viable part should be easier when I get to that section of the re-build.

Neck Piston

The rear neck piston seems to feature a ball joint, but it could also possibly be a universal joint. Can anyone shed any further light on this? I am hoping these can be easily made with varying diameters of plastic tubing.


A nice clear shot - see how the braided hoses connect to the underside of the skull (clearest on the right-side)


Above are a selection of nice clear images showing the positioning of the neck hoses and pistons


Above is more evidence of the hose connecting to the underside


Someone hadn't considered how the hoses and pistons would work in this scene: solution = remove them

RESEARCH - EYES

I pulled together a selection of screen caps from the 2013 BluRay of The Terminator to try and get to the bottom of some of the details of the original design.

Below are a selection of hi-res shots of the eyes featured in the movie, in their various guises. As you'll likely notice, they vary in appearance throughout the movie. This is down to the various roles they were fulfilling and their final scale. Extreme close-ups of the eye (showing the fantastic opening/closing iris) would have likely been accomplished with a larger scale reproduction of the Endo Skull's eye socket, to achieve a greater level detail and fidelity, possibly made at twice the actual size. This shows the lens as having a clear glass finish, revealing the soulless black beyond it when the iris contracts (like another relentless predator of nature, the shark). The red light emanating from within is a flat, even hue.


 The super-scale close-up model of the eye suggests the lens is clear

Views of the 1:1 scale animatronic skull seem to show a red-tinted lens, back-lit by a softer red bulb. The image below of Schwarzenegger's puppet with exposed eye suggests the lens is actually slightly pearlescent, although this could just be due to reflections. Subsequent images make it almost look like a large LED has been used (like in my original build of the skull), although it seems likely that all of the 1:1 scale versions used throughout the making of The Terminator would feature the same lens/bulb combo from Stan Winston Studios.


Is it a red lens and bulb, or a clear lens and red bulb?


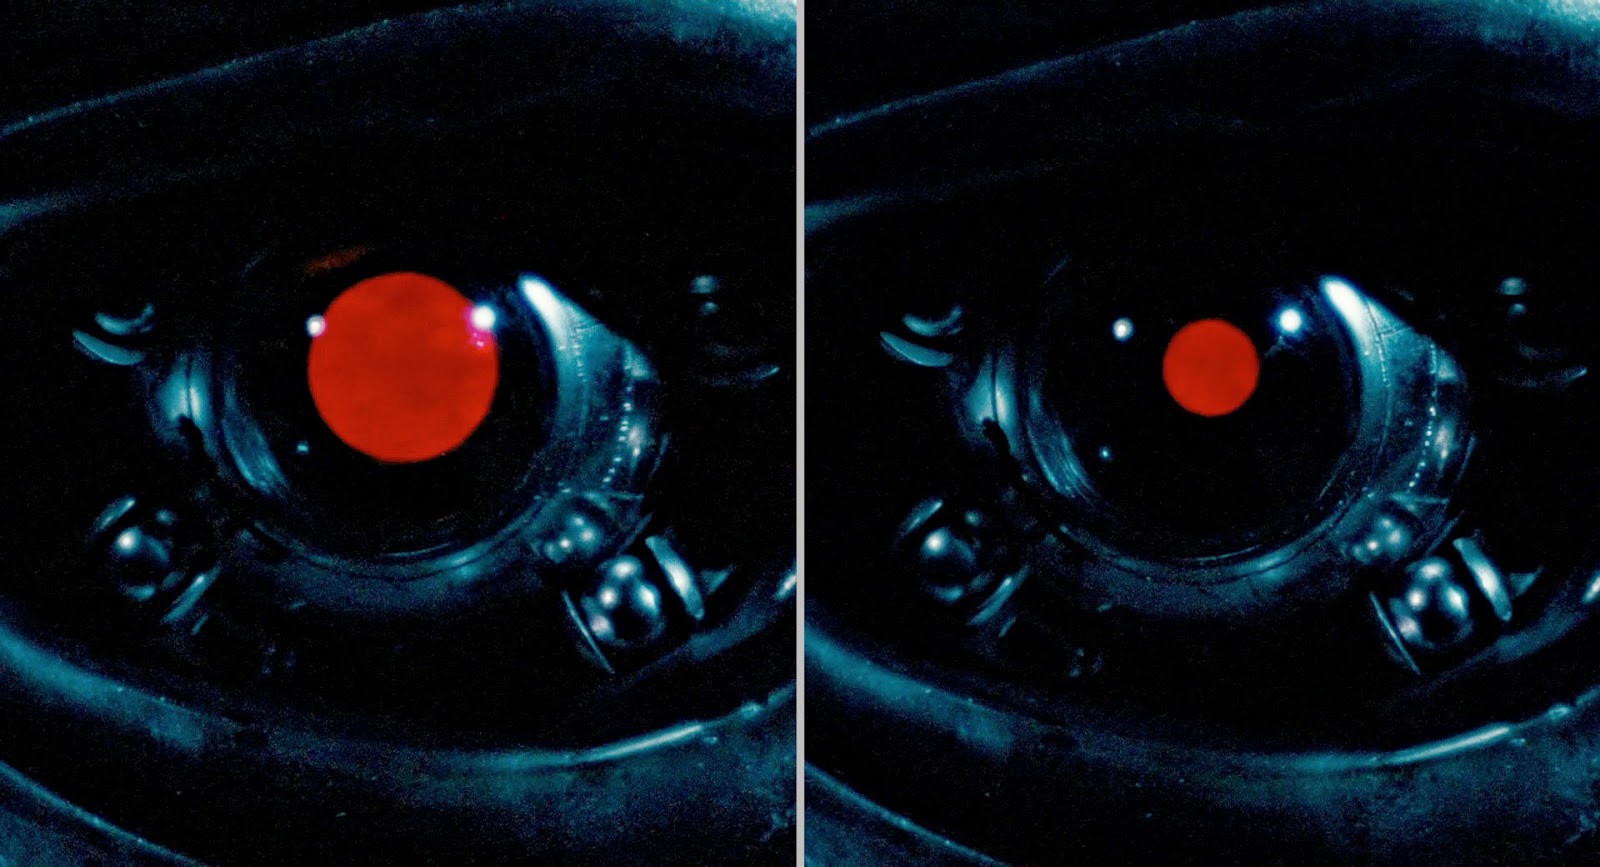
Does this quick build by Stan Winston for the dying T800 utilise a clear or red lens?

The eyes most commonly found used on shop-bought reproductions of the Endo Skull are those from T2 onwards. They feature a stippled/textured appearance (much like the brake lights on cars), which wasn't an element of the original design from The Terminator.


Sideshow Collectables textured lenses. Note the non-standard darker 'eye ball'


Stan Winston Studios T800 skull (with chromed teeth) from the opening credits of T2. Note the red lens


Oversized skull for close-up shots in Terminator 2 with clear lens.

So what's the conclusion? Well, there is no definitive answer due to different types of lens/bulb being used for different applications during filming. I guess it's up to personal preference.

I personally like the 'clear lens rear-lit with red bulb' combo; I feel the Terminator's eyes should look dead when unlit (ie clear, not red) - this probably stems from my memory of the eyes shown in top image in this post; the soulless black eyes of this relentless killing machine. My preference is reinforced by this last image above (from T2); it looks crisper and 'correct' to me somehow.

RESEARCH - OVERVIEW

In my memory, the definitive version of the T800 is the horrifying de-skinned Endo-Skeleton revealed at the climax of The Terminator:


Arnold Schwarzenegger minus his skin; the seemingly unstoppable T800 Model 101

There have been numerous Terminator Endo Skulls available on the market over the years for a premium price, most recently from Sideshow Collectables. They tend to fall into two categories: clean (shiny chrome) and battle-damaged (weathered with a sooty/grimy finish):


Sideshow Collectables Clean and Battle-Damaged T800 Endo Skulls


Although great pieces in their own right, these display-worthy Endo Skulls have details/features that I believe can be improved upon, or are not an iteration of the T800 that is the 'true' version in my eyes (see above). These are namely the eyes, the teeth, and the neck rods/hoses. The Sideshow skulls (and to be honest most other versions of the skulls) seem to be referencing the T800 from Terminator 2 onwards, where as I will be looking at the original CSM101 endoskeleton as my point of reference.

INTRODUCTION

Over 10 years ago I purchased one of the (relatively) cheap vinyl copies of the T800 Endo Skull and set about building and painting it with cheap silver car paint. The end results were passable, and so I put it in a glass case, displayed it for a short time, and then stored it away and forgot about it for a decade. This is how it turned out all that time ago:


OLD VERSION of the Endo Skull on which the paint unfortunately melted.

I had no experience with soft vinyl kits before (or since) and was surprised recently when I unearthed the skull (still in its display case) in the attic, to find that the silver paint was now tacky; almost sticky to the touch. Simple light touches resulted in fingerprint marks in the surface - it was ruined. After searching around on the internet it appears that this is a common trait of vinyl kits (something I was completely unaware of); painting directly onto the vinyl either never really dries, or appears to dry and then over time (especially if heat is involved, such as a warm attic) the vinyl starts to react with the paint making it sticky.

So, in a nutshell, I ended up with an un-displayable T800 skull. I decided I'd try and strip it back down to the vinyl, see how much I can tidy it up, hopefully learn from my mistakes, and perhaps do a better job of it than the first time around. And so that's where this little side project started. 

Over the last few weeks I realised I'd built up a stack of useful information regarding the re-build, and so decided to document it as I presumed there may be someone out there who may find some of it useful.

And so it begins....